X-Arcade Tankstick Max Spinner Sensitivity Boost Kit: Installation Guide
Buy it here: <https://shop.xgaming.com/products/tankstick-max-spinner-booster-kit>
Upgrade Kit Contents:
- New COMBO PCB (consolidates all spinners and track into a single output)
- High-Speed Swappable Spinner Sensor Modules
- High-Resolution Discs for the Spinners (1 for each spinner, 1 spare)
Features of the Upgrade:
- Provide increased the spinner sensitivity
- The COMBO PCB has a built-in Mixer, eliminating the need for a mixer adapter when using a Raspberry Pi
- DIP switches allow adjustment of spinner sensitivity, X/Y movement swapping, and enabling/disabling the mixer function
DIP Switch Usage
| Function | CPR | SW1 | SW2 | SW3 | SW4 | | --- | --- | --- | --- | --- | --- | | 2X SPEED(DEFAULT) | 1600 | ON | ON | | | | 1X SPEED | 800 | OFF | ON | | | | 1/2X SPEED | 400 | ON | OFF | | | | 1/4X SPEED | 200 | OFF | OFF | | | | X/Y | | | | ON | | | Y/X | | | | OFF | | | Mixer Disabled | | | | | ON | | Mixer Enabled | | | | | OFF |
IMPORTANT NOTE for RETROPIE USERS with the SPINNER:
While the CPR value we provide works correctly on PC, we've noticed that on the Raspberry Pi, the spinner is processed at half the CPR that our spinner actually sends to the device. So, if you’ve set the sensitivity to 30 on a PC (for example), you’ll need to double it to 60 on a Raspberry Pi to achieve the same speed.
For detailed instructions on how to set up spinner sensitivity and to see a list of games with their CPR specifications, check out this guide: <https://wiki.arcadecontrols.com/index.php?title=Spinner_Turn_Count>.
*Video Guide:*
Special thanks to OleSchool Gamers for creating this professional content!
*<https://youtu.be/1KEw2N9v90U?si=NOcbhi1YvVuR8d9V>*
Instructions:
A. Replace the COMBO PCB:
- Open the Tankstick Max Case and refer to the link for detailed instructions on opening the case: <https://support.xgaming.com/support/solutions/articles/12000003087-how-do-i-open-my-x-arcade-controller-case->
- Inside the case, locate the current COMBO PCB and carefully remove all connections attached to the PCB
 
- Unscrew all the screws securing the PCB to the case and gently remove the old COMBO PCB from the case
- Place the new PCB in the same location as the old one, and secure the new PCB with the screws, but do not overtighten to avoid damaging the board
- Reattach all the cables and connectors to the new COMBO PCB
B. Detach and Swap the Sensor Modules:
- Inside the case, locate the spinners and the sensor modules, which are attached to the spinner body via a plastic holder with one open side
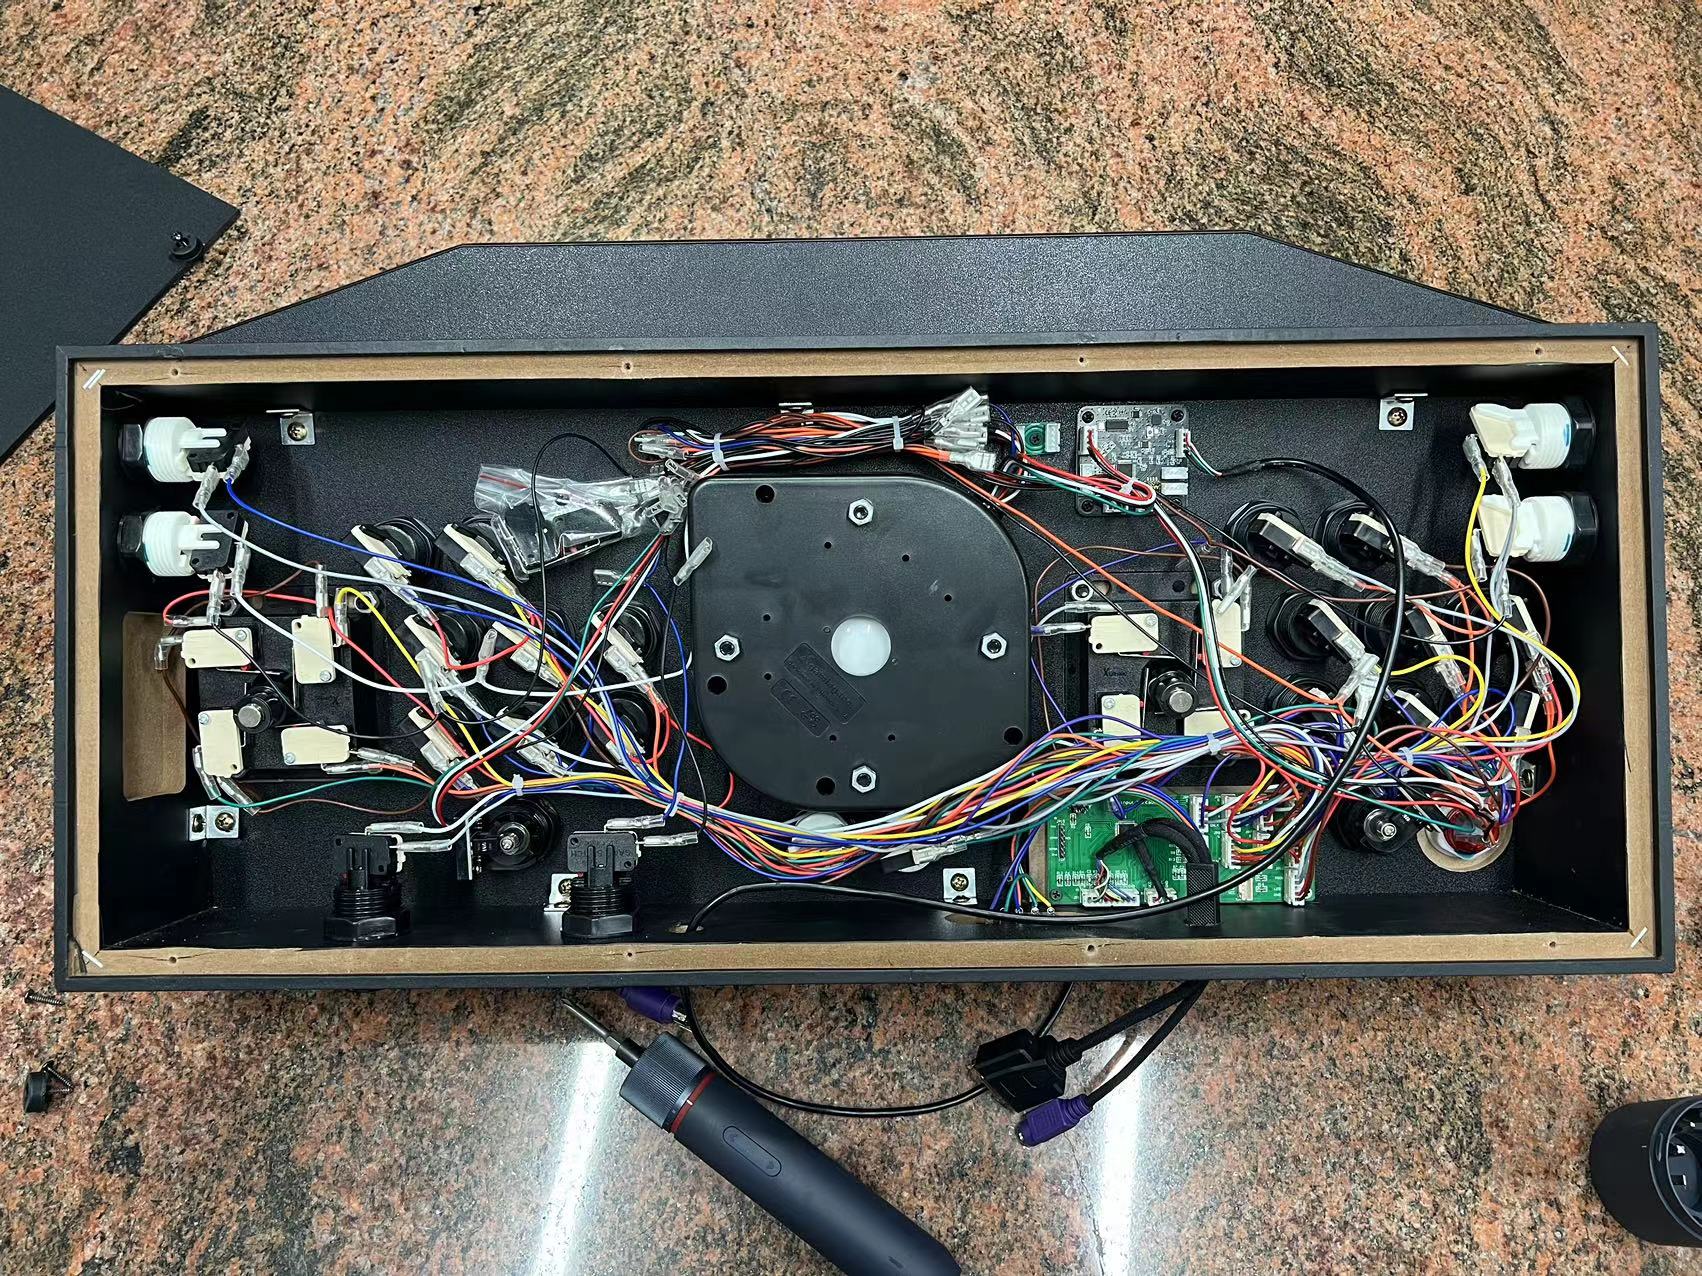

- Pull the sensor holder towards the PCB direction to detach the sensor module from the spinner

- Disconnect the connector from the old sensor module, replace it with the new sensor module from the kit, and reconnect the connector. Repeat this process for both spinners
C. Replace the Discs and Reattach the Sensor Modules:
- Hold the spinner knob from the other side with one hand to prevent it from rotating, then use a screwdriver with your other hand to unscrew the screw holding the old disc and remove the old disc

- Attach the new sensor modules to the spinners by pushing them back into place, and rotate the sensor module holder to ensure the positioning block is locked securely

- Install the new high-resolution disc onto the spinner and secure the disc by tightening the screw, ensuring it is firmly attached


- Follow these steps for both spinners to complete the upgrade
D. Close the Case and GAME ON
Once all components are replaced and secured, close the Tankstick Max case, power on your system, and enjoy enhanced gaming with upgraded spinner sensitivity and performance
Source article: <https://support.xgaming.com/support/solutions/articles/12000101878-x-arcade-tankstick-max-spinner-sensitivity-boost-kit-installation-guide>